Guia do usuário do dispositivo de transmissão sem fio Roomcast


Como um nível empresarial sistema de apresentação sem fio , O Yealink RoomCast permite que os participantes transmitam suas telas para uma TV simultaneamente por meio do Yealink Wireless Presentation Pod, Miracast, AirPlay e Google Cast, e usem recursos de colaboração interativos. Com suporte para transmissão de 4 telas para uma TV, Yealink RoomCast traz conteúdo de reunião mais rico, poupando você de alternar telas. Com o Yealink RoomCast, você pode realizar compartilhamento de tela fácil e colaboração eficiente.
Este guia apresenta a implantação, conexão e configuração (na web) sobre o Yealink Sala de cinema.
Além deste guia do usuário, também fornecemos o seguinte documentos:
Guia de Início Rápido do RoomCast: apresenta o pacote do RoomCast e como instalá-lo e implementá-lo. Guia de Compartilhamento de Tela do RoomCast: apresenta como usar o RoomCast para compartilhar telas.

Não. | Porta Nome | Descrição |
1 | CC 12 V porta | Conecte-se à fonte de alimentação por meio de uma tomada adaptador. |
2 | Internet porta | Conectar à rede dispositivo. |
3 | HDMI porta | Conecte a uma tela/projetor para exibir vídeo imagens. |
4 | USB porta | Conectar para dispositivo de toque, Yealink Wireless Presentation Pod, teclado, mouse e assim por diante. |
5 | Segurança Slot | Permitir que você para conectar um cabo de segurança universal ao RoomCast, para que você possa bloqueá-lo. O RoomCast não pode ser removido quando bloqueado. |
6 | LIDERADO Indicador | Exibir o status de Sala de cinema. |
Lar Tela

Não. | Descrição |
1 | Exibir a hora e data. |
2 | Exibir os disponíveis compartilhamento de tela tipo e método. |
3 | Exibir o endereço IP de Sala de cinema. |
4 | Exibir o Bem-vindo mensagem . |
5 | Mostrar a marca logotipo . |
6 | Exibir o nome do ponto de acesso sem fio e senha . |
7 | Exibir o nome da sala de reunião ou dispositivo nome . |
Este guia pretende orientá-lo na instalação do RoomCast e no uso do RoomCast para compartilhar telas.

Observação: Você pode conectar o RoomCast a uma rede com fio ou Wi-Fi. Sim.
Você pode compartilhar sua tela usando Yealink Wireless Presentation Pod, Miracast, AirPlay e Google Cast. A seção a seguir apresenta como usar o WPP20 para compartilhar telas. Para obter mais informações sobre outros métodos, consulte o Guia de Compartilhamento de Tela do RoomCast.
Certifique-se de ter pareado o WPP20 com o RoomCast e conectado o WPP20 ao PC que está ligado sobre.
Faça um dos seguindo:
• No WPP20, pressione o botão de apresentação para compartilhar a tela inteira do Computador.
• No WPP20, pressione longamente o botão de apresentação por 3 segundos e depois solte este botão. Selecione a janela que deseja compartilhar e clique em Comece a compartilhar .
• No software Yealink Wireless Presentation Pod, clique em Compartilhamento avançado . Selecione a janela que deseja compartilhar e clique em Comece a compartilhar .
Esta seção apresenta como acessar a interface de usuário web do RoomCast e configurar as configurações básicas, de rede e do sistema.
1. Você pode fazer login na interface do usuário da web do RoomCast por meio dos dois seguintes métodos:
• Quando o RoomCast se conecta a uma rede com/sem fio rede:
um. Certifique-se de conectar o PC e o RoomCast ao mesmo Rede local.
b. Abra um navegador da web e digite o endereço IP do RoomCast (exibido no canto inferior direito da tela inicial).
c. Entre no nome de usuário e senha (o nome de usuário do administrador padrão é administrador e a senha é 0000 ) e clique Conecte-se .
• Quando o RoomCast não se conecta a uma rede com fio rede:
um. Conecte o PC ao AP sem fio fornecido pela RoomCast. O nome e a senha do AP são exibidos na tela inicial, e o nome padrão é Yealink-XXXXXX.
b. Abra um navegador da web e digite o endereço IP do RoomCast (exibido no canto inferior direito da tela inicial).
c. Entre no nome de usuário e senha (o nome de usuário do administrador padrão é administrador e a senha é 0000 ) e clique Conecte-se .
2. Após efetuar login, defina a personalização, hora, rede, Wi-Fi e senha de acordo com o rápido configurar.
Observação: A configuração rápida aparecerá automaticamente quando você fizer login na interface do usuário da web pela primeira vez. Você também pode clicar em Configuração rápida no canto inferior direito para abri-lo.
Esta seção apresenta como compartilhar telas, personalizar a tela inicial e controlar o LED indicador.

Você pode compartilhar sua tela usando Yealink Wireless Presentation Pod, Miracast, AirPlay e Google Elenco.
1. Na interface do usuário da web, vá para Básico > Tela Elenco .
2. Configure e salve o seguinte configurações:
Parâmetro | Descrição |
Miracast | Habilitar ou desabilitar o RoomCast para compartilhar telas via Miracast. Padrão : habilitado. |
Google Elenco | Ative ou desative o RoomCast para compartilhar telas via Google Elenco. Padrão : habilitado. |
Elenco de WAN Porta | Habilitar ou desabilitar o RoomCast para compartilhar telas via rede com fio do escritório rede. Padrão : habilitado. Se desabilitado, os usuários não podem compartilhar telas pela rede sem fio que o RoomCast conecta-se a. |
Na tela Código | Habilite ou desabilite o código PIN na tela ao usar Miracast ou AirPlay para compartilhar telas. Padrão : desabilitado. |
AirPlay | Habilitar ou desabilitar o RoomCast para compartilhar telas via AirPlay. Padrão : habilitado. |
Observação: Para obter mais informações sobre o método de compartilhamento de tela do RoomCast, consulte o Guia de compartilhamento de tela do RoomCast.
Você pode personalizar o papel de parede, idioma, tema ou outros para a tela inicial do Sala de cinema.
1. Na interface do usuário da web, vá para Básico > Sobre- Tela .
2. Configure e salve o seguinte configurações:
Parâmetro | Descrição |
Tema | Defina o tema do RoomCast como detalhado ou simples versão. Padrão : detalhado. |
Papel de parede | Defina o RoomCast papel de parede. Observação : você pode carregue um papel de parede que você goste. Os formatos de arquivo suportados são png, jpg ou jpeg. O tamanho do arquivo não deve ser maior que 5 MB e a resolução não deve ser maior que 2MP. |
Papel de parede Carrossel | Habilitar ou desabilitar o papel de parede do RoomCast carrossel. Padrão : desabilitado. |
Na tela Linguagem | Defina a exibição do RoomCast linguagem. |
Nome da sala de reunião/anfitrião Nome | Defina o nome do dispositivo do RoomCast ou o nome da sala de reunião onde o RoomCast está localizado. |
Bem-vindo Mensagem | Defina a mensagem de boas-vindas de Sala de cinema. |
Mostrar Resolução | Defina a resolução da saída do RoomCast imagem. Padrão: automático. A resolução disponível que você pode selecionar varia de acordo com a tela que você conectar. O RoomCast selecionará automaticamente a melhor resolução para se ajustar à tela conectada. tela. |
Parâmetro | Descrição |
Exibir IP Endereço | Habilitar ou desabilitar a tela inicial para exibir o IP do RoomCast endereço. Padrão : habilitado. |
Exibir Wi-Fi Nome | Habilitar ou desabilitar a tela inicial para exibir o RoomCast Wi-Fi nome. Padrão : habilitado. |
Exibir Wi-Fi Senha | Habilitar ou desabilitar a tela inicial para exibir o RoomCast Wi-Fi senha. Padrão : habilitado. Este parâmetro está disponível somente quando você habilita o Exibir Wi-Fi Nome . |
Mostrar Tempo | Habilitar ou desabilitar a tela inicial para exibir o tempo. Padrão : habilitado. |
Exibir marca Logotipo | Habilitar ou desabilitar a tela inicial para exibir a marca logotipo. Padrão : habilitado. Você pode carregar o logotipo da sua marca. Os formatos de arquivo suportados são png, jpg ou jpeg. O tamanho do arquivo não deve ser maior que 5 MB. |
Você pode habilitar ou desabilitar o indicador LED de Sala de cinema.
1. Na interface do usuário da web, vá para Básico > LIDERADO Controlar .
2. Habilitar ou desabilitar o LIDERADO Indicador .
Status | Descrição |
Vermelho | Em marcha lenta modo |
Verde | Trabalhando |
Desligado | Poder desligado |
Esta seção apresenta: como conectar o RoomCast a uma rede sem fio e usar o RoomCast para fornecer um ponto de acesso Wi-Fi.

Além de conectar o RoomCast a uma rede com fio, você também pode conectá-lo a uma rede sem fio. rede.
1. Na interface do usuário da web, vá para Rede > Rede sem fio > Conectar para sair Rede .
2. Clique Digitalizar rede sem fio para procurar o wireless rede.
3. Selecione a rede sem fio desejada e conecte o RoomCast a ela. Se a rede estiver protegida com senha, insira sua senha.
4. Clique Confirmar para conectar.
O dispositivo de exibição informa que o RoomCast está conectado a uma rede sem fio rede.
Observação: A característica de Conectar-se à rede existente é habilitado por padrão. Se você desabilitar esse recurso, o RoomCast não poderá se conectar a uma rede sem fio.
Você pode definir os parâmetros do ponto de acesso Wi-Fi fornecido Sala de cinema.
1. Na interface do usuário da web, vá para Rede > Rede sem fio > Wi-fi Ponto de acesso .
2. Configure e salve o seguinte configurações:
Parâmetro | Descrição |
Wi-fi Ponto de acesso | Habilitar ou desabilitar o Wi-Fi ponto de acesso. Padrão : habilitado. |
Banda | Configurar a frequência do Wi-Fi ponto de acesso. • 2,4G • 5G Padrão: 5G. |
Rede Nome | Configurar o nome do Wi-Fi ponto de acesso. Observação : se você altere o parâmetro acima, você precisa desconectar e conectar o WPP20 para conectá-lo para o RoomCast para atualizar a configuração do Wi-Fi. Além disso, você precisa reconectar os dispositivos conectados ao Wi-Fi Hotspot fornecido pelo RoomCast. |
Senha | Configurar a senha do Wi-Fi ponto de acesso. Observação : se você altere o parâmetro acima, você precisa desconectar e conectar o WPP20 para conectá-lo para o RoomCast para atualizar a configuração do Wi-Fi. Além disso, você precisa reconectar os dispositivos conectados ao Wi-Fi Hotspot fornecido pelo RoomCast. |
Canal | Configurar o canal do Wi-Fi ponto de acesso. • Auto • 36 • 40 • 48 • 149 • 153 • 157 • 161 • 165 Padrão: auto. |
IP da LAN Endereço | Configurar o tipo de geração do hotspot Wi-Fi endereço. • Auto - gerar o segmento de endereço do hotspot Wi-Fi automaticamente. O o segmento de rede padrão é 192.168.144.X. • Manual - se o segmento de rede gerado automaticamente entrar em conflito com o que você usar, você pode alterar o segmento de rede, por exemplo. Padrão: auto. |
Rede Isolamento | Habilitar ou desabilitar a rede isolamento. Padrão : desabilitado. Geralmente, os dispositivos conectados ao Wi-Fi Hotspot fornecido pelo RoomCast pode acessar a internet. No entanto, se você habilitar esse recurso, aqueles os dispositivos só podem compartilhar telas, mas não podem acessar a internet. |
Propriedade Intelectual Endereço | Configurar o endereço IP do Wi-Fi ponto de acesso. Observação : O IP o endereço que você inserir deve atender ao formato, por exemplo, 192.168.145.X. Somente quando o Endereço IP da LAN está definido como manual, você precisa configurar este parâmetro. |
Esta seção apresenta como definir a programação de energia e atualização para o Sala de cinema.
Poder Agendar
Se você habilitar esse recurso, o modo de economia de energia será iniciado automaticamente após o RoomCast ficar inativo por um período de tempo especificado fora do horário de trabalho definido. Você pode definir o horário de trabalho e adicionar até 5 horas de trabalho. Se você desabilitar esse recurso, o RoomCast ficará em status de trabalho o tempo todo.
1. Na interface do usuário da web, vá para Sistema > Cronograma de energia > Poder Agendar .
2. Habilitar Poder Salvando
3. Clique Adicionar , defina a hora e clique Salvar .

Durante o modo de economia de energia, nenhum sinal HDMI está sendo emitido, enquanto o Wi-Fi ainda está funcionando. Você pode iniciar o compartilhamento de tela para acordar o RoomCast.
1. Na interface do usuário da web, vá para Sistema > Cronograma de energia > Poder Agendar .
2. Habilitar Poder Salvando .
3. No Tempo limite de economia de energia campo, defina o tempo e clique Confirmar . Observação: Ative o RoomCast com qualquer uma das seguintes ações:
• Qualquer dispositivo se conecta ao AP sem fio fornecido pelo Sala de elenco
• Qualquer dispositivo inicia a tela fundição
• Conecte ou desconecte o USB cabo
• Conecte o HDMI cabo
• Acorde a tela dispositivo
Se você habilitar esse recurso, o RoomCast verificará se uma nova versão está disponível em um horário específico a cada dia. Se estiver, o RoomCast atualizará automaticamente para a nova versão.
1. Na interface do usuário da web, vá para Sistema > Atualizar > Atualizar Agendar .
2. Habilitar Automático Atualizar .
3. Defina o Hora de atualização e clique Confirmar .
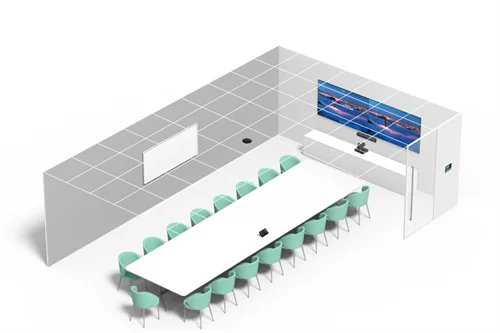
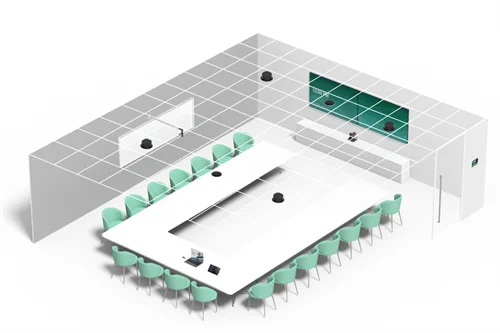
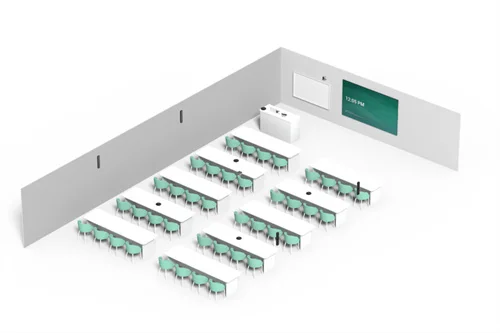
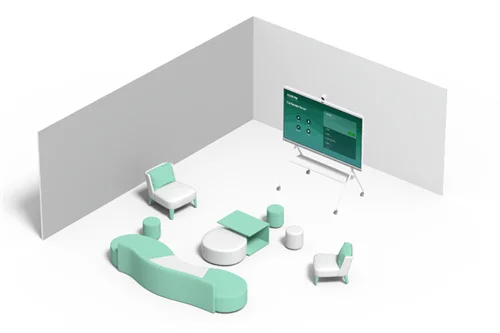
Descubra como diferentes configurações de sala podem otimizar seu espaço para vários cenários. Explore estudos de caso para encontrar as melhores configurações para salas de reunião, salas grandes, salas em formato de U, salas de aula e espaços abertos, garantindo experiências de áudio e vídeo perfeitas para Teams e Zoom.
Melhore a experiência intuitiva dos dispositivos Yealink em sistemas de videoconferência por meio de diagramas 3D, de fiação, de assentos e de efeitos sonoros
Abrangendo desde espaços de reunião Huddle até espaços de reunião extragrandes


Dispositivo de videoconferência incluído cobrindo de Médio para sala de conferências extragrande
Contate-nos
Entre em contato conosco para orçamentos de produtos e consultas de instalação. Notificaremos prontamente um revendedor local para fornecer soluções de serviço precisas e eficientes.


